
How to Make a Rope-to-Chain Splice
A rope-to-chain splice is the same as the eye splice, the major difference is that the line forming the eye goes through the top connection of your anchor chain, and the eye is snugged tight. This allows a smooth move from rope to chain to twist through the tramp of a windlass as you're dropping or recovering the anchor. Here's how to make a rope-to-chain splice using a three-strand rope.
1. Whip it Great
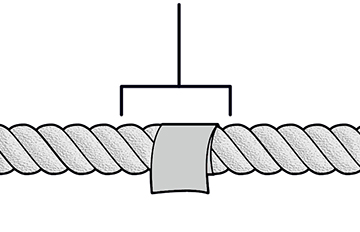
Using a piece of masking or electrical tape that measure half inch wide, whip the line firmly around the rope for about 16 to 20 "picks" (the width of each spiraling strand) from the end. With half-inch line, this is equivalent to 30 to 35 cm.
2. Loosen up the Strands
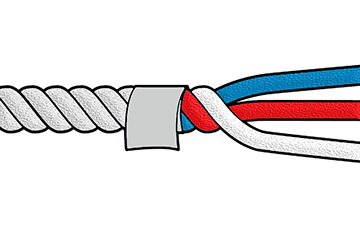
Spread out the three strands all the way back to the whip. Firmly tape the ends of each of the strands to keep the better fibers from disentangling. Make a cone shape with the end of the tape to make the weaving procedure go a bit easier.
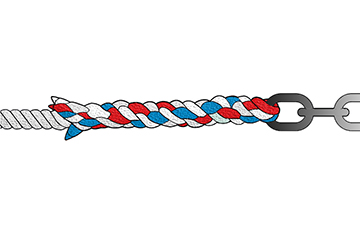
3. String the Strands
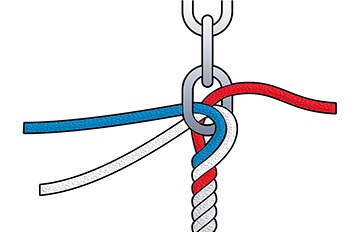
Pass two of the strands one way through the top connection of the anchor chain, and after that string the third the other way between the two others. Some boaters put a section of heat-shrink tubing inside the connection and string the strands through it, Once the splice has been completed, a heat gun is being used to shrink it. Thin then serves as chafe protection.
Tip: Secure the upper 12 to 18 inches of the chain at a comfortable with working height; else, it gets extremely awkward, making it impossible to hold up the main part of the heavy chain while making the splice.
4. Tuck and Weave
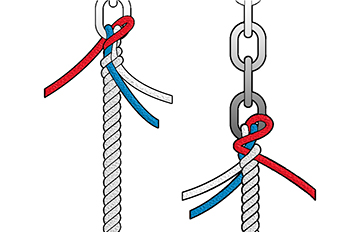
Weave the strands by inserting them one by one through the strands shaping the standing some portion of the line. After every arrangement of tucks, the strands ought to develop in a symmetrical manner — like a tripod — from the standing line.
Tip: A marlinspike is a useful instrument in isolating the strands of the standing line necessarily wide to make the weaves.
5. Cut and Melt
After completing five to six weave cycles, pull everything as tight as possible and then cut the three strands within a half-inch of the body of the splice. Use a lighter or torch to soften the closures of each strand, enabling it to merge into the body of the splice.
So there you have it, happy splicing!